The Granny Over Crochet Sweater Pattern Guide.
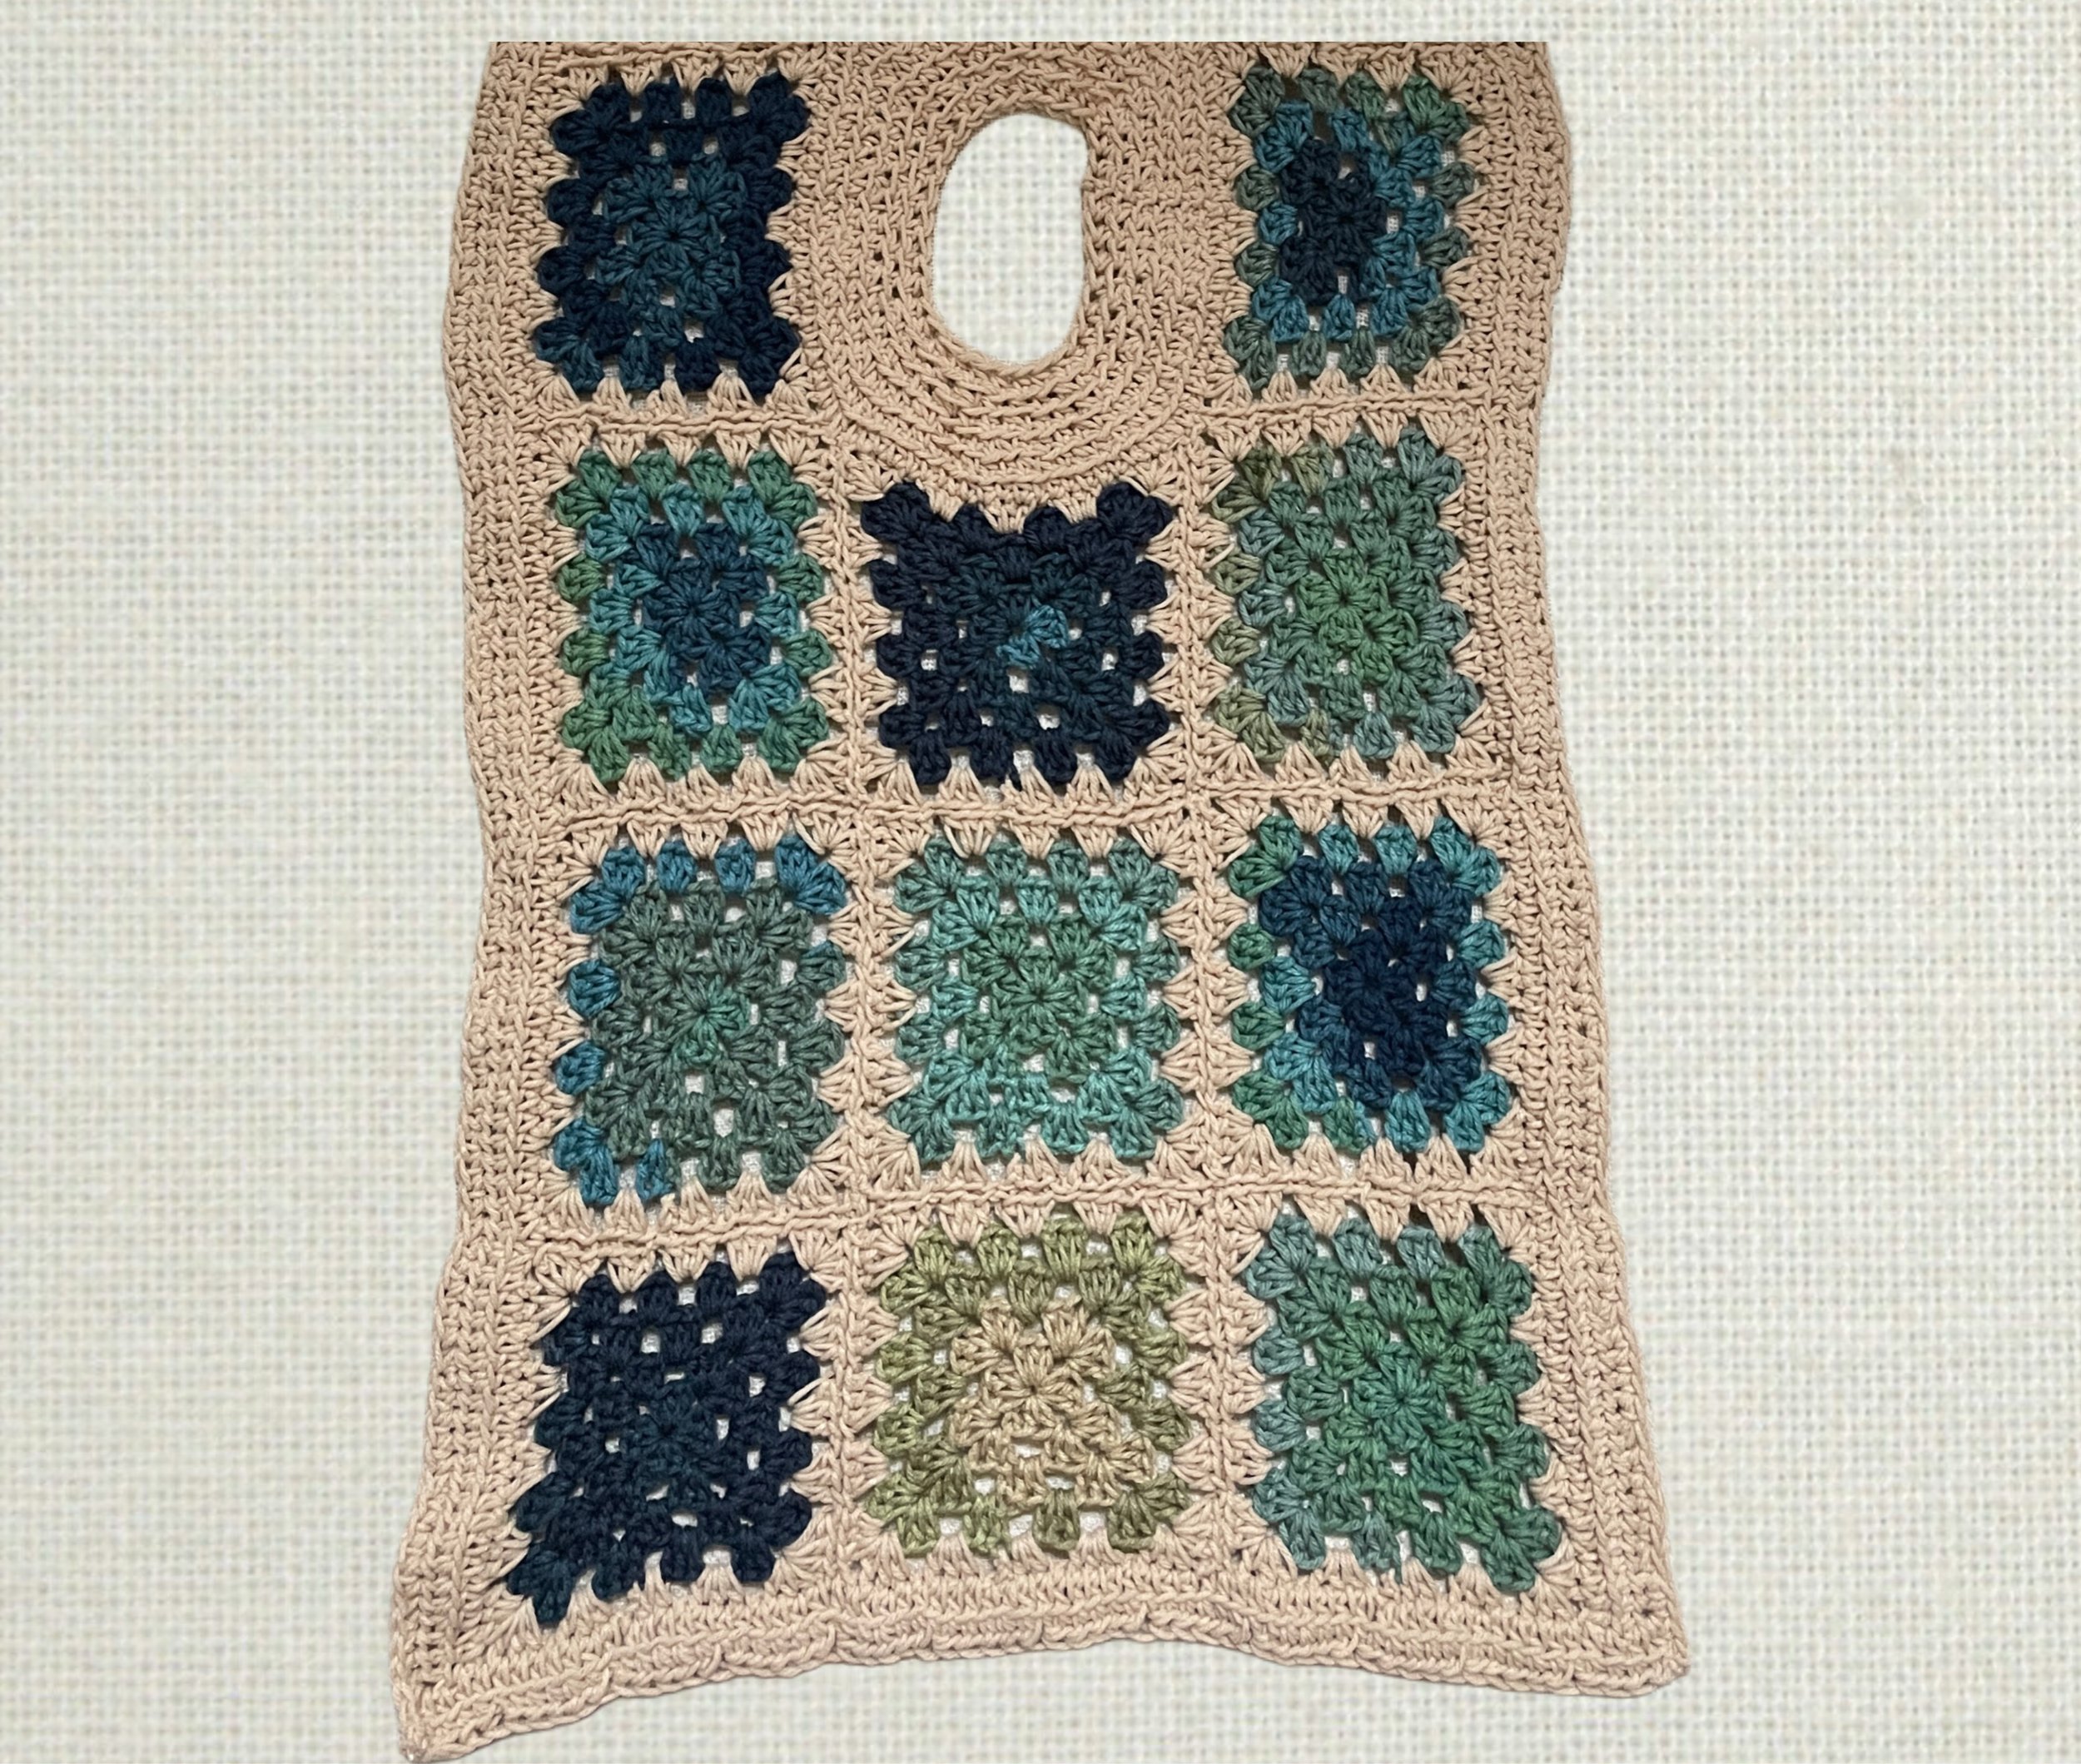
Hello there! Wanted to share one of my stash busting yarn designs, featuring one of my favorite techniques-The Granny Square. Mixing it up with some variegated yarn that I’ve had in my yarn collection for a bit of time, wanting to put it to new & good use. This sweater concept was created in 2 panels of Granny Squares, attached & then detailed with borders. Its entirely provided much warmth as well.
MATERIALS
Created a total of 20 [5 Round [HDC STS] Granny Squares
Note: May create in multiples of 3 [increase for 23 Total Squares]
Using:
[ 1-2 Balls of the Variegated Yarn]
[Used 2 Balls of the Solid Yarn]
*May increase yardage for extra length/personal desired fit,
Yarn: Variegated Yarn: Red Heart [Medium 4, 141g / 5oz, 215m /236yd] & Solid Yarn: Mainstay Yarn [Medium 4, 100% Acrylic Yarn weight: 375 yds.]
US H/8 5.00MM Crochet Hook
Yarn Needle
Scissors
Measuring Tape
Stitch Markers
Gauge:
12 SC STS [Going Across Row] [width] X 9 SC STS [Going Down Row] [length] = 4 in.
Granny Squares: 6.5 x 6.5 in.
Details:
Oversized/Wide Style
42 inches across [width] X 24.5 inches [length]
Abbreviations:
CH [#] Turning Chain initiated
STS= Stitch [es]
SC= Single Crochet
HDC= Half Double Crochet
DC= Double Crochet
SC2TOG=Single Crochet Together
FLO= Working in the Front Loop STS Only
STARTING THE PATTERN
Note: Pattern is constructed in 2 Panels, [Front and Back] then attached.
Created a total of 20 Granny Squares: HDC STS
Note: [For a Sizing/Length increase of Top, may increase in multiples of 3 Squares!] [23 Total]
COLOR A= VARIEGATED YARN
COLOR B= SOLID YARN
ROUND ONE
COLOR A
CH 3 and connect with a SL ST, insert hook into the circle to work in the round.
CH 2 (to count as the first DC) make 2 HDC STS, CH 3, (3 HDC STS, CH 3) three times. Join with a SL ST at the top first ST of the starting CH 3
ROUND TWO
COLOR A
CH 3 (to count as the first HDC and for the CH 1 corner space) *into the next CH 3 space, make 3 HDC STS, CH 3, CH 1) *Repeat this Step two times for a total of 3 times around. Now into the last CH 3 space, make 3 HDC STS, CH 3, and 2 HDC STS to join with a SL ST to the 3rd CH of the first ST starting Chain.
ROUND THREE
COLOR A
CH 2 (to count as the first HDC) into the next CH 1 space, make the first granny cluster of this round work 2 HDC STS, CH 1, *into the following CH 3 corner space, make 3 HDC STS, CH 3, 3 HDC, CH 1, into the next CH 1 space, make 3 HDC, CH 1 *Repeat these Steps all around until you reach the beginning chain. Then join with a SL ST to the top starting Chain 2.
ROUND FOUR
COLOR A
CH 3 (to count as the first HDC and for the CH 1 space) *into the next CH 1 space, make 3 HDC STS, CH 1) into the following CH 3 corner space, make 3 HDC STS, CH 3, 3 HDC STS, CH 1, *Repeat these Steps into each of the remaining CH 1 and CH 3 spaces. Into the last CH 1 space, make 2 HDC STS. Join with a SL ST to the top of starting Chain 2.
ROUND FIVE
COLOR B
CH 2 (to count as the first HDC) into the next CH 1 space, make the first granny cluster of this round work 2 HDC STS, CH 1, *into the following CH 3 corner space, make 3 HDC STS, CH 3, 3 HDC, CH 1, into the next CH 1 space, make 3 HDC, CH 1 *Repeat these Steps all around until you reach the beginning chain. Then join with a SL ST to the top starting Chain 2.
FASTEN OFF WORK. WEAVE IN ENDS.
ATTACHING THE SQUARES
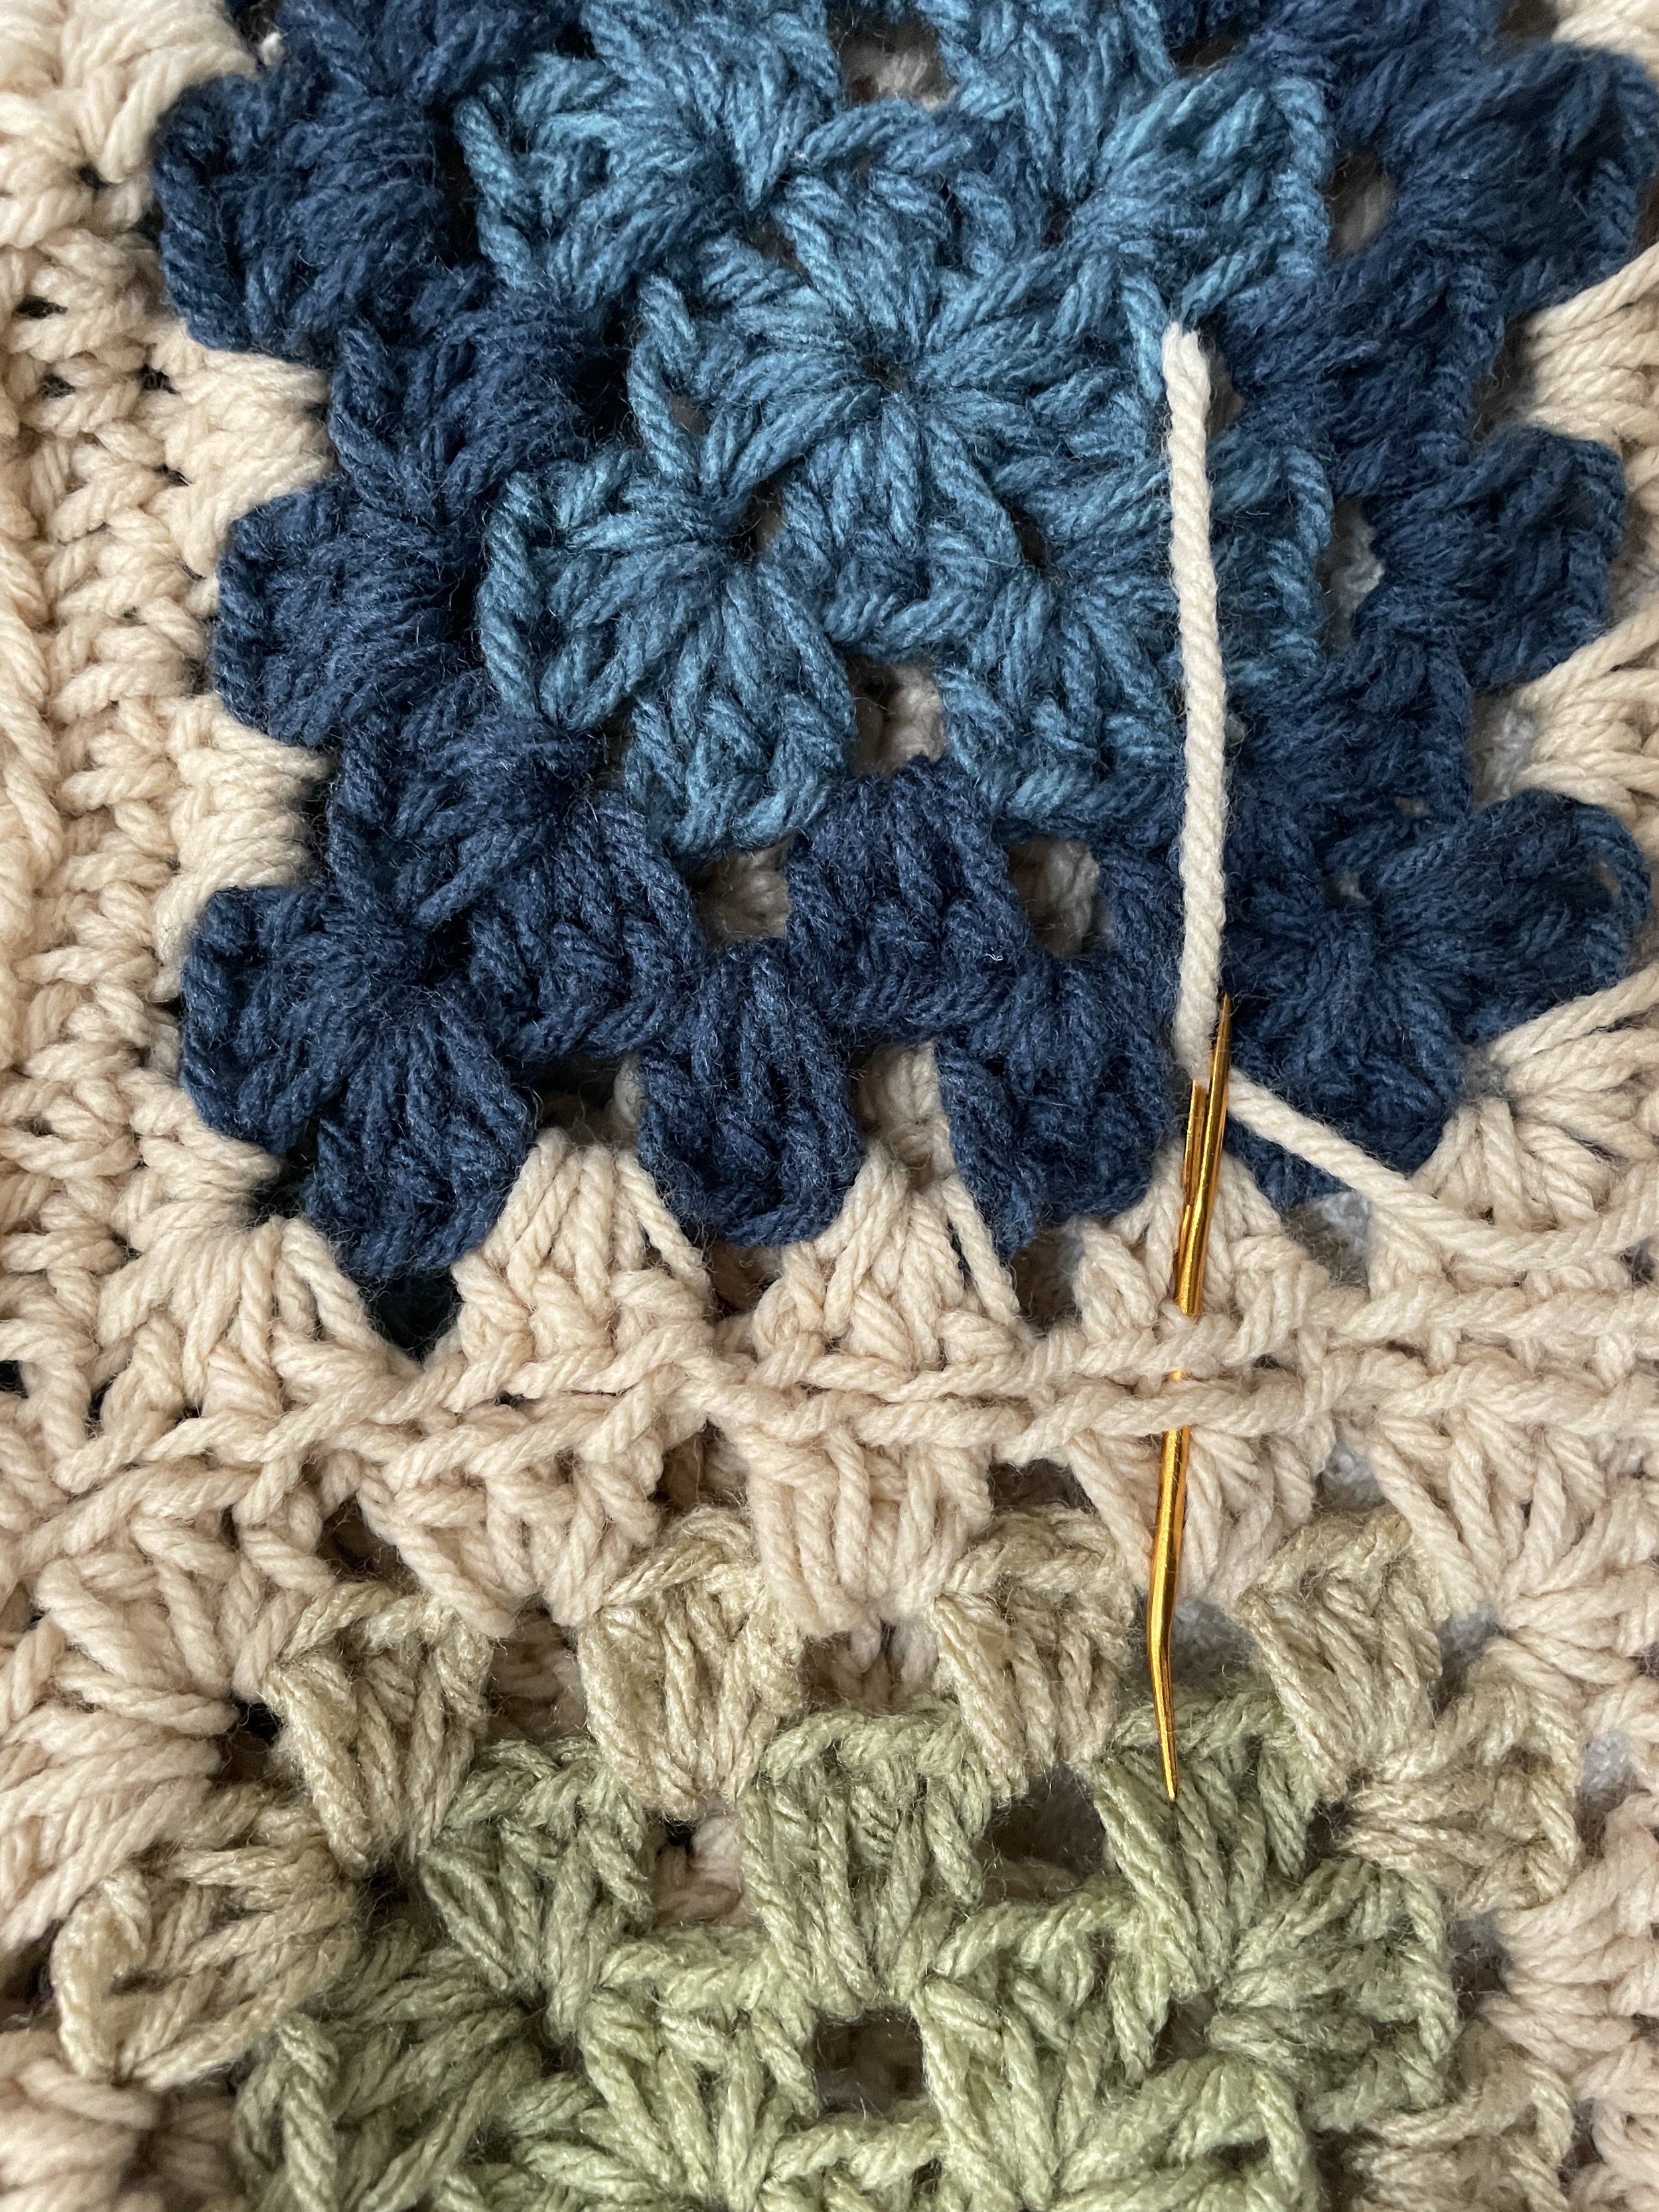
Once the Granny Squares are complete. Using your yarn needle and a stand of yarn.
Create the Front and Back Panels by attaching the Squares,
9 for the FRONT PANEL and 9 for the BACK PANEL
3 Rows of 3 Squares
2 Squares will be attached to 1 of the PANELS, to create the Shoulder/Straps/Neckline Opening.
*NOTE: For the 23 Squares, May add the extra row, so 4 Rows of 3 Squares.
See Visual Guide Below:
EXP: BACK PANEL: 9 Squares Attached
EXP: FRONT PANEL: 9 Squares Attached, with the 2 Squares [The Shoulder/Strap Squares] attached at the Top.
Leaving a square in the middle Open and Free.
ATTACHING THE PANELS
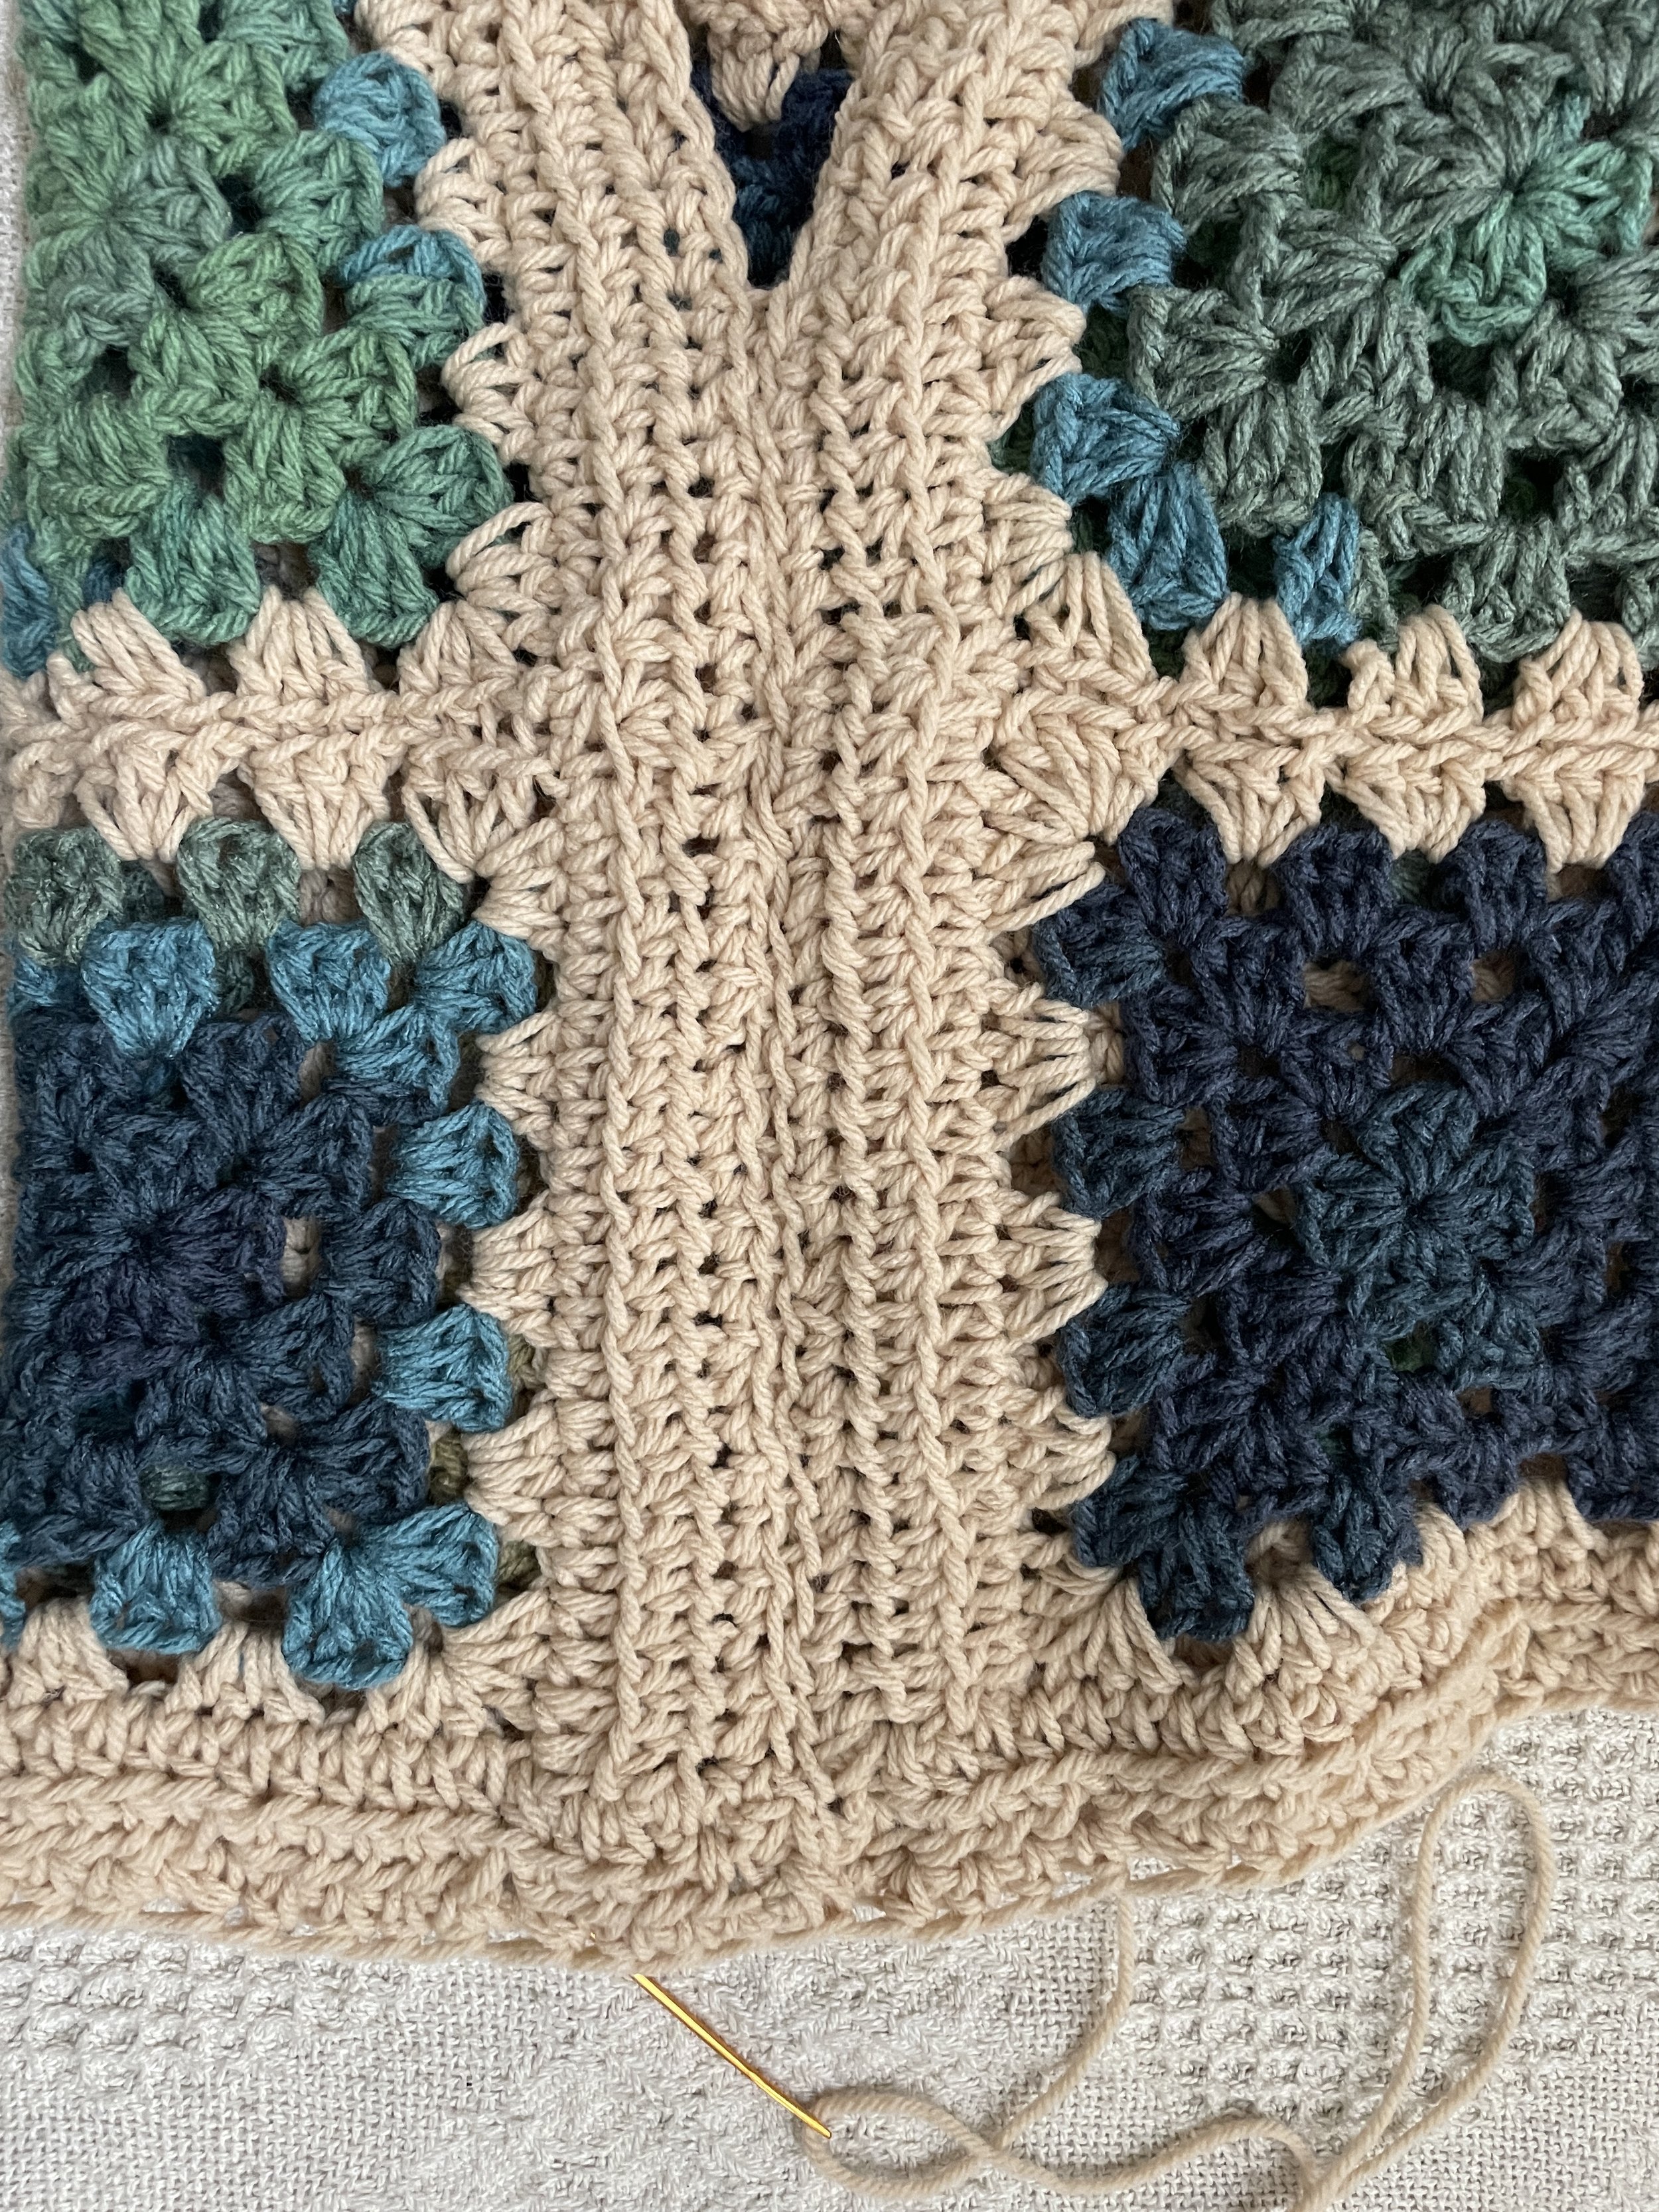
Once the panels are complete. Using your yarn needle and a stand of yarn. You will attach the Top 2 Squares, from the FRONT PANEL, to the BACK PANEL, in the same location to connect the piece together. [See Visual Reference Below] Which will leave the middle section free, which is now your Neckline. to rejoin your hook and further create the Neckline detailing.
CREATING THE BORDER DETAILS
Once both of the Panels are attached . Rejoin hook to creating the Finishing Technique for the Entire Attached Piece. Rejoin hook into the bottom side ST of the attached Panels, to start working in rounds, for the entire Piece to create the Border.
RND1: CH2, 1HDC around into the STS , at the end of the round, SL ST into the starting chain to continue work.
[Working in the FLO only] RND2: CH2, *1HDC into the following 4 STS and into every 5TH ST, HDC2TOG….[Repeat from ** until the end of the round, at the end of the round, SL ST into the starting chain to continue work.]
[Working in the FLO only] RND3: CH1, *1SC into the following 4 STS and into every 5TH ST, SC2TOG….[Repeat from ** until the end of the round, SL ST into the starting chain to complete work. Fasten off. Weave in ends.]
ATTACHING THE SIDES
This Step will create the Sleeve Openings for both sides of the Top.
Once the borders are complete. Using your yarn needle and a stand of yarn. Fold the Panels together, You will attach the sides [both Left and Right] Starting from the bottom to the desired location] EXP: I attached mine 2 Squares up from the bottom.
CREATING THE NECKLINE DETAILING
Rejoin your hook with your solid yarn [Color B] into the opening side ST of the Squares. To now work in rounds to create the Neckline Detailing.
RND1: CH2, 1HDC around into the opening STS of the attached Squares, at the end of the round, SL ST into the starting chain to continue work.
[Working in the FLO only] RND2: CH1, *1SC into the following 2 STS and into every 3rd ST, SC2TOG….[Repeat from ** until the end of the round, at the end of the round, SL ST into the starting chain to continue work.]
[Working in the FLO only] RND3: CH1, *1SC into the following 2 STS and into every 3rd ST, SC2TOG….[Repeat from ** until the end of the round, at the end of the round, SL ST into the starting chain to continue work.]
[Working in the FLO only] RND4: CH1, *1SC into the following 3 STS and into every 3rd ST, SC2TOG….[Repeat from ** until the end of the round, at the end of the round, SL ST into the starting chain to continue work.]
[Working in the FLO only] RND5: CH1, *1SC around and into all of the STS, at the end of the round, SL ST into the starting chain to complete work. Fasten off. Weave in ends.
FINISHED LOOK.


